In spite of what any program might say; no update or installation is perfect. Everything you download on your computer is prone to certain errors like Error Code 0x80070570. If you are very lucky or perhaps follow the appropriate guidelines cautiously, only then will you be able to experience a smooth and glitch-free download. However, The File is Corrupted or Missing (0x80070570) Error happens just once in a blue moon.
The 0x80070570 code is a very common error that has been encountered by numerous users in the past. It occurs primarily when you attempt to update your Windows to the newer version, or simply install Windows in the first place.
As a user, it is never ideal to ignore errors. An error is a depiction of something that is going wrong in your computer, and it is always best to rectify it at the earliest before it turns around and causes more inconvenience for your desktop.
Contents
When Does The 0x80070570 Error Come?
To dig further into the topic, let us take the help of an example. Windows 7 is a user-friendly version of the Windows operating system by Microsoft. That is why; a lot of its users are inclined towards updating it or installing it freshly too. However, it is not guaranteed that this update will be an easy one to download.
It is bound to present a lot of errors during the process, one of which is being the 0x80070570 error code. It disrupts the installation, thus preventing the update from downloading on your computer.
The problem does not end at this. The error is bound to occur differently in different situations, all of which have been categorized accordingly for your reference:
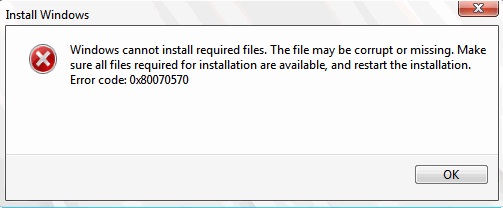
Type 1 – The first place where the error displays is during the Windows 7 installation (as mentioned earlier in the example). In this case, your screen displays the following message:
Windows cannot install required files. The file may be corrupt or missing. Make sure all files required for installation are available and restart the installation. Error code: 0x80070570.
Type 2 – The next type is when the error occurs during the Windows 10 installation. This was encounter by a number of users, restricting them from downloading the new OS altogether. Their screen flashed the following words:
“Some refresh records are missing or have issues”.
Type 3 – The third and final type is when the error occurs due to some fault in the hardware or software of your computer. In this situation, it disrupts the user from transferring data and files from one type of storage to another. Here, the error would just very simply display the code 0x80070570.
What Causes Error 0x80070570
Users have encountered this error due to a variety of reasons; a few of which are listed for your reference:
Reason 1 – The installation disk may have gotten corrupt or damaged, or your computer may not be able to process the required files or settings associated with the installation.
Reason 2 – When the application does not display the exact or correct location of the files associated with the download, the error is bound to occur. This might happen due to some fault in the registry settings of your computer.
Reason 3 – The system may not always be able to locate essential files that are stored in hidden folders or certain locations that the system may not allow. Some files could even be stored in the Recycle Bin of your computer.
Reason 4 – The SATA Drivers- short for Serial Advanced Technology Attachment- could be having some technical error due to which they may not be recognized by your system during the installation process.
Reason 5 – Lastly, your computer could very well be infected with some virus or malware that could be preventing the download. A virus can enter your system while the download is on as well, so you need to be cautious about where you are downloading your content from. A virus is even capable of deleting or manipulating your data.
How To Fix The Windows Error Code 0x80070570?
Now that you are thorough with all essential information related to the error code, let us proceed towards finding a solution to get rid of it.
As discussed before, this error can occur in 3 different types, so different solutions will need to be followed for each type accordingly. Your job is to figure out where is it that you are encountering the error, and then find a respective solution for the same. Let us start with the first type.
Type 1- Windows 7 Installation Error Code 0x80070570
Following are 5 fixes you can abide by to get rid of the error. Each of them is a tried and tested solution.
Method 1 – Reduce the Probability of 0x80070570 Error
This method suggests a precaution you can take prior to the installation, in order to reduce the probability of the 0x80070570 error occurring.
In a lot of cases, a corrupted ISO file on a perfect or a damaged CD or USB Drive can cause the 0x80070570 error code. In order to avoid such a situation, your best shot would be to use a fresh USB Drive with the latest ISO file to install Windows, rather than emptying out a used one.
If you wish to use a CD, make sure to use one burned with a copy of Windows and Microsoft products with a legal license key. This will reduce the chances of the error from appearing and ensure you a safe and error-free download.
If you are burning the CD yourself, it is advised that you do it at a slow pace because the faster you burn it; the more your CD becomes prone to errors. Hence the write speed is directly proportional to the probability of the error. Further, the CD should be of good quality to protect your download from more errors.
Method 2 – Reboot the Entire Download
If the error occurs despite following the preventive methods mentioned above, then the first and most important step you should take is to reboot the entire download. Rebooting and reinstalling is a significant solution to a problem like this, and has proved effective for numerous users in the past.
Following are a few precautions you should take before you proceed with the reinstallation:
Precaution 1 – Make sure you install Windows with the latest ISO file and the latest BIOS version.
Precaution 2 –Make sure to disconnect all hardware devices (speakers, microphone, printer, etc) from your computer before you go ahead with the download. Hardware has a great chance of coming in between your download and interrupting it.
Precaution 3 – When you start with the download, keep a lookout for the error. If the error appears and disrupts your installation, then cancel the download and click on the ‘Install Now’ button once again. Follow this procedure until its completely rebooted.
Method 3 – Run Chkdsk In The Windows RE
This method requires you to restart your computer and boot it with the installation disk. Follow the steps mentioned below to go about it:
Step 1 – Start by putting the installation CD in the computer’s optical drive and then restarting the computer.
Step 2 – If any instructions prompt up on your computer screen, follow them accordingly to go through with the Windows installation.
Step 3 – Set the language appropriately, and then select the option labeled ‘Repair my computer‘.
Step 4 – Navigate to the particular installation that needs repair and then proceed by clicking on ‘Next‘.
Step 5 – Now, you would be taken to a menu that would show the ‘System Recovery‘ option. Double-click on it to open a Command Prompt.
Step 6 – In the Command Prompt, manually type in the words “chkdsk/f/r” and then press Enter. Wait for the repair process to complete.
Step 7 – Lastly, restart your computer. You can do this by selecting ‘Y‘. Check if this has made any change.
Method 4 – Change The BIOS Settings
This is not a very common cause behind the error, but if you have; there is nothing to worry. A fault in the BIOS settings of your computer can be a significant reason for the error, so changing them should rectify the problem that you are facing. This technique is quite effortless, provided you follow the flow of steps appropriately:
Step 1 – Start by Booting your computer into BIOS. While the computer is booting, all the necessary prompt information will be displayed on the screen.
Step 2 – The information will tell you to press a specific key on the keyboard to enter into the BIOS of your computer. Usually, the key used is F2, however, go through what your computer displays and press the required button respectively.
Step 3 – Once done, go to the ‘Drives‘ option and select ‘SATA‘. Then, you will be required to do some changes. Where ever it is written “RAID Autodetect-AHCI”, change it to “RAID Auto detect-ATA”.
Step 4 – Make sure to save your changes in the settings and exit the BIOS. Finally, try installing Windows to see if the error pops up.
Method 5 – Clean Your Registry
The Registry of your computer plays the crucial role in making sure everything in your system is running correctly. It includes all the settings, options, entries for software as well as hardware, and so on. If any of the files get damaged or corrupt, then the Registry would begin to malfunction, thus displaying the 0x80070570 error code.
To avoid such a mishap, it is very important that you keep cleaning your Registry from time to time. This solution is recommend by most technicians as well.
There are a lot of ways you can go about cleaning the Registry. Ideally, you should do it through a third-party tool or program. If not, then it can manually be done with the assistance of professional operations too. It is up to you how you want to proceed with the process; just make sure to back up all your data before you begin. You do not want to be losing precious files in an attempt to get rid of the problem.
Type 2 – Windows Update KB3116908 Failed To Install Error 0x80070570
If you encounter the 0x80070570 error in its type-2 form, then you will have to follow a separate set of instructions in order to get rid of it. Follow the procedure below:
Step 1 – Start by going to the C Drive on your computer and into the following location:
C:\Windows\SoftwareDistribution\Download
Step 2 – There will be a number of folders display in front of you. Navigate to the folder with the following name: a39ba752a8aa7203217c75802d7fddd
Step 3 – Once you find it, delete this folder. You will have to log in as an administrator to carry out this action.
Step 4 – Once deleted, Restart your computer and try installing the update once again. This should be able to rectify your problem.
Type 3 – Error 0x80070570: The File Or Directory Is Corrupted And Unreadable
Finally, let us come to the third type in which this error can occur. If you recall, this is when you attempt to move files from one type of storage to another. In this case, listed below are several solutions you can adopt to obtain desired results:
Method 1 – Run A Antivirus Program
For a lot of users, it is highly likely that the reason they cannot transfer files or data is that some sort of virus has entered the computer that is obstructing them to do so. Viruses are very capable of stealing or tampering with information inside files, thus you should be sure to steer clear of them at all times.
For this, you should readily have an antivirus program installed on your computer, which will fight any malware or threat from attacking your data. Running scans from time to time on your desktop is the key, and will eliminate the error if a virus is what was causing it.
Method 2 – Check For the Drivers Installed And Updating Drivers
The Drivers of the computer play a vital role in the operations performed by the system. If you are unable to update or install Windows, there is a high possibility that an outdated Driver is a cause behind it. Check the Driver settings of your computer by following the given steps:
Step 1 – Right-click on the ‘My Computer‘ icon on your desktop and click on ”Properties‘ from the menu.
Step 2 – Click on the ‘Device Manager‘ tab on the left part of the new Window that has opened.
Step 3 – Then, from the list of devices displayed on your screen, check to see if the drivers are working correctly or not.
Step 4 – If you observe a problem, you will be able to find an option that allows you to update the driver in the ‘Driver‘ tab.
Step 5 – Make whatever necessary changes you need to before exiting the Manager. Once done, save your changes and reboot your computer.
Method 3 – Defragment The Hard Disk
Defragmenting your hard drive gives you easy access to all parts of the drive. You get a more organized setup for locating files, thus eliminating any hidden file that may be the root of the problem. Follow the given steps to go about defragmenting your disk:
Step 1 – Go to the Control Panel of your computer. There, click on the ‘System & Security‘ option.
Step 2 – Once redirected, click on the ‘Defragment hard drive‘ option.
Step 3 – This will open a defragmenter window. Click on the ‘Analyze Disk‘ button to see if it really even needs defragmenting.
Step 4 – If it does, then click on the respective Defragment Disk button. If not, then you are good to go.
Step 5 – Either way: once done, exit all tabs and check if the error continues.
Method 4 – Recover Any Lost Data
If none of the previous methods have helped, the last resort you can turn to is recovering any data that may have been lost among the partitions, thus becoming inaccessible. The way to go about doing this is by installing a program called ‘Eassos Recovery Free‘. It helps you access hidden files and restore them to their original state. Once installed, follow the given steps:
Step 1 – Start by launching the software. Select the required Recovery mode by clicking on the corresponding button.
Step 2 – Select the partition that consists of your required file. This might take some time depending on the size of the partition, so you need not get restless. Once selected, click on the button labeled ‘Next‘.
Step 3 – Now, you will be displayed with all the inaccessible files on your screen. Here, all you have to do is click on the ‘Recover‘ button for each of the files.
Step 4 – Once done, Exit the software and proceed with your prior installation. Check if you encounter the error again.
Similar Posts:
- 0x80300024 Error When Installing Windows
- Application Error 0xc0000005
- Error Code 0x80004005: Unspecified Error
- BSOD Error 0x0000007B: Windows Fail to Boot
Conclusion
By now you have been familiarized with all the relevant methods for resolving this problem. Under ideal circumstances, one or the other out of these should free you of the 0x80070570 error code. If not, then your best shot would be to simply take your computer to the nearest technician and give it up for repair.


