Nvlddmkm.Sys error is one that a lot of users have reported in the past. It causes your screen to go completely blue, and eventually, the computer to shut down or restart. There can be numerous causes behind the error; some very common ones are listed for your reference:

- Faulty Graphics Card driver.
- Discrepancies between programs in the computer.
- Overloading of the Graphics Card.
- Issues with the RAM.
Contents
How to Fix Nvlddmkm.Sys Error in Windows 10
Do not worry; you are not the only one seeking a solution to Nvlddmkm.sys (Video_TDR_Failure) error. It is very common for users having Windows 7 or above, which is why the following are some methods you can try out on your own to get your screen back to normal:
Solution 1 – Run A Memory Check On The System
In a lot of cases, it is your computer’s RAM that is causing the Video_TDR_Failure (Nvlddmkm.sys) error. The RAM is actually responsible for a lot of common errors, so you need not worry. All you need to do is run a Memory Check on your system. Here is how:
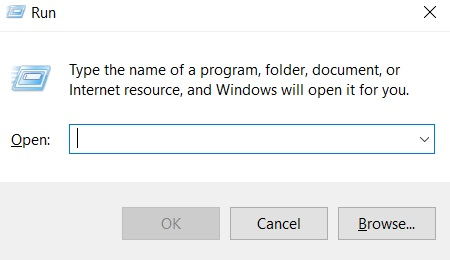
Step 1: Press the Windows key and the alphabet ‘R’ simultaneously to open the Run Command.
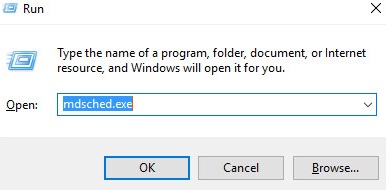
Step 2: Then, manually type in words mdsched.exe in the dialogue box and click on ‘OK.’
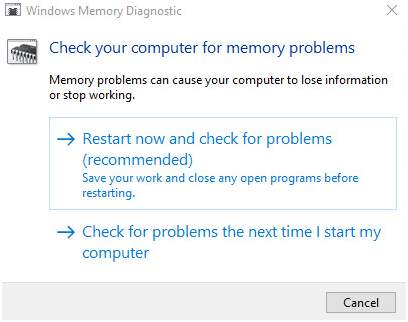
Step 3: Now, there are two ways you can proceed further. Follow the one that you think is most suitable for your computer. You can either click on ‘Restart now and check for problems’ (this is the more recommended solution) or you can choose ‘Restart now and check for problems the next time I start my computer.’
Step 4: Either ways, your Memory Check is going to start. Wait for up to 15-20 minutes for it to finish.
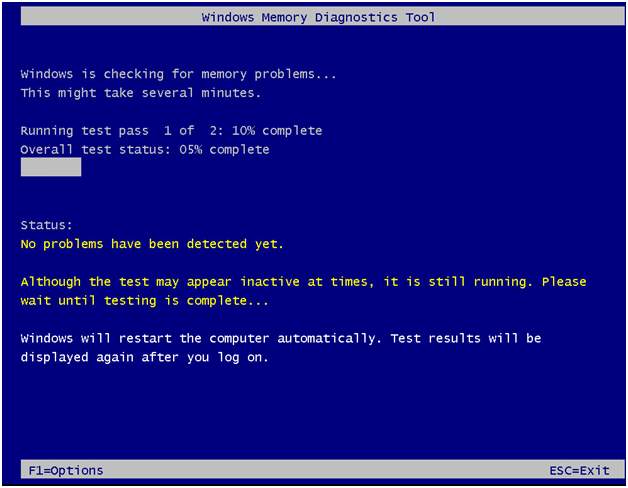
Step 3: Once the Check gets over; all the errors will be displayed on your screen. Proceed towards rectifying them using suitable methods.
Check Out:
- Ethernet Doesn’t Have A Valid IP Configuration
- Widevine Content Decryption Module
- Bad Pool Header Error
- DPC Watchdog Violation
Solution 2 – Remove any Conflicting Programs
Sometimes, the error of the blue screen is bound to occur if some recent installation or software is not fully compatible with your computer. Any conflicts among installed programs could be causing the error.
In this case, you need to figure out if the error began occurring immediately after you installed something on your device. If you are able to crack it, then you should either restore the updates or uninstall the recently added programs as a whole. The way to go about doing this, of course, differs for each program.
Solution 3 – Change the Graphics Card
When you run too many games or applications simultaneously or with small intervals, it may cause overloading of the Graphics Card of your computer, thus causing the error to appear. In this case, you will have to take your device to the nearest store to see if that is where the problem lies; followed by replacement of the card. Then check if the error continues to occur.
Method 4 – Reinstall Graphics Card driver
Since Video_TDR_Failure (Nvlddmkm.sys) error involves the color of the screen, the issue is highly likely to lie in the graphical settings of your computer. Therefore, rectifying the Graphics Card driver of your system could rid you of the error. Following are the steps for the same:
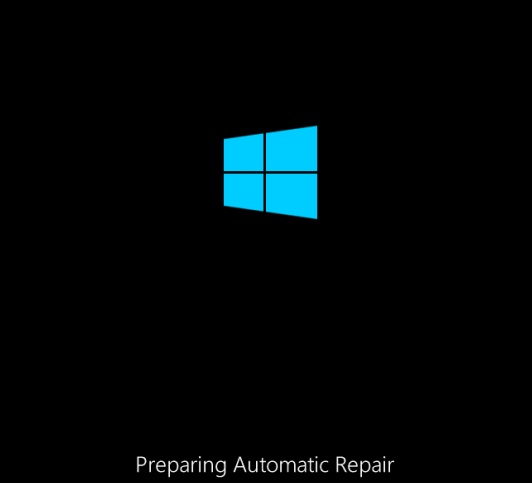
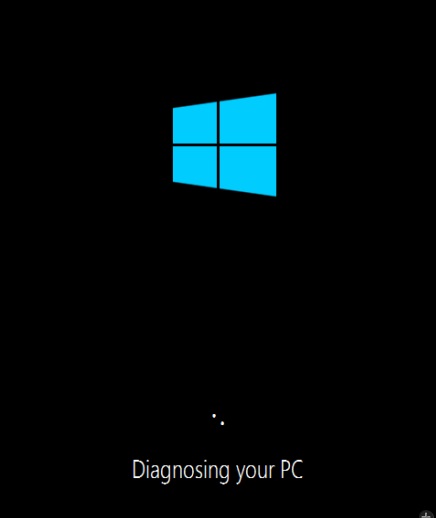
Step 1: First, begin by restarting your computer. Do this by long-pressing on the power button. Do this at least 2 times, until the ‘Preparing Automatic Repair’ option appears.
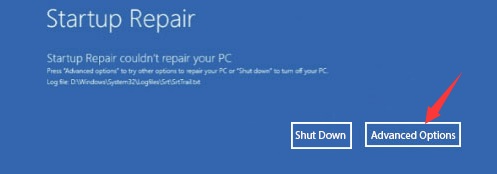
Step 2: After the diagnosing of your PC is complete; you will be taken to a screen that says ‘Startup Repair‘. There, click on ‘Advanced Options‘.
Step 3: Next, from the ‘Choose an Option‘ menu, select ‘Troubleshoot,‘ and once again go to ‘Advanced options.’
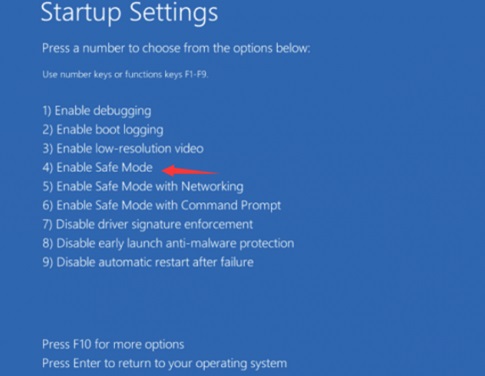
Step 4: From the next screen, click on ‘Startup Settings‘ and then click on the option that says ‘Restart‘ at the bottom of the screen.
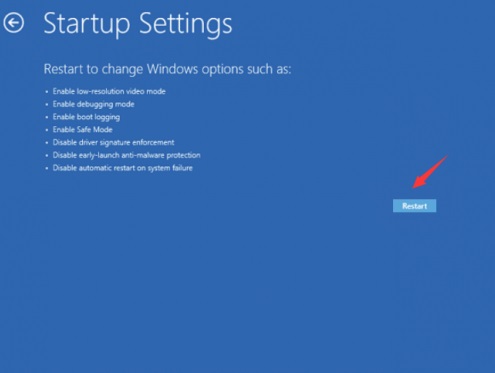
Step 5: Following the next instructions on the screen, press F4 or F5 Keys to enter into safe mode for the startup, with or without a network – whatever works out more convenient for you.
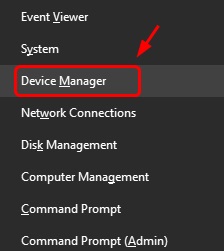
Step 6: Once the rebooting process is complete, press the key for Windows and ‘X’ at the same time, and click on the Device Manager.
Step 7: Click on the ‘Display Adapters’ tab to expand it and right-click on NVIDIA to uninstall it.
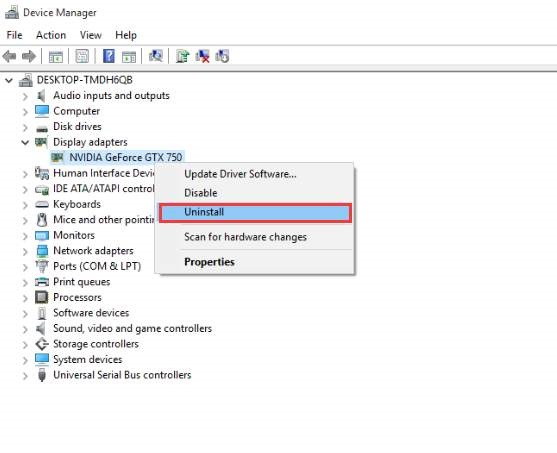
Step 8: Check to ‘Delete the Driver Software for this Device’ and then click on ‘OK’ on the prompt window.

Step 9: Next, install the latest version of the driver once again from the official website.
Step 10: Navigate to this given address: C:\Windows\System32\Drivers and rename the file from sys to nvlddmkm.sys.old. Then, press ‘OK.’
Step 11: Next up, find the NVIDIA folder in your computer’s C Drive and copy-paste the nvlddmkm.sy_ file to the desktop.

Step 12 – Then, open the command window and manually type in the following command:
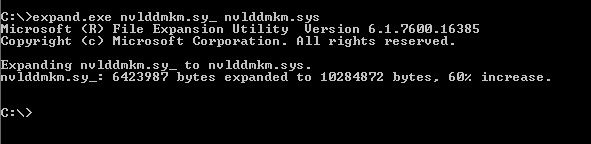
expand.exe nvlddmkm.sy_ nvlddmkm.sys
Step 13: Now, copy the newly created sys file onto the C drive and into the C:\Windows\System32\Drivers folder.
Step 14: Lastly, restart your system to see if the blue screen is gone.
Solution 5 – Update Your Windows
With the coming of new updates every season, as a user, you will, of course, want to keep your system up to date to be able to enjoy new features. You should check for updates every few days, as an outdated version of Windows could easily be the cause behind the error. The way to go about it is written for your reference:
Step 1: Press the Windows key and the alphabet ‘I’ at the same time to be taken to the Windows Settings.
Step 2: Over there, click on the option that says ‘Update & Security.’
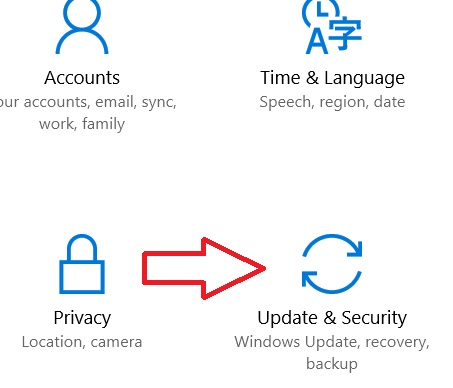
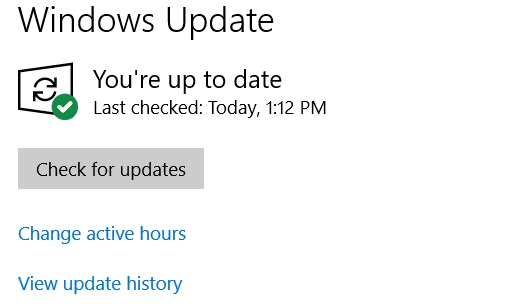
Step 3: Select the tab that says ‘Windows update,’ and click on ‘Check for Updates’ on the next screen. If an update is available, download it to see if the error continues.
Solution 6 – Run a Disk Check on your system
Sometimes, the reason why you may be experiencing the Nvlddmkm.Sys error is because of certain faults in the disk. Thus, running a disk check will indicate the presence of any error. However, a disk check does have some backdrops. It involves a risk of data loss. That is why you need to make sure all your files and data is backed up before you proceed with this method. Once your back up process is complete, follow the listed steps to go about running the disk check:
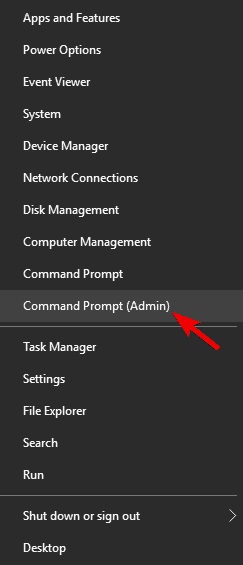
Step 1: To start with, press the Windows key and the key ‘X’ at the same time.
Step 2: Next, click on the ‘Command Prompt’ to run it as Administrator.
Step 3: In the next window, manually type in this command and press Enter:
chkdsk /f c:
Step 4: You will now be redirected to a page asking your permission to run a disk check and reboot your computer. To allow, press ‘Y’ and then press Enter.

Step 5: Now, exit the command and just restart your computer. It will take around 20 minutes for the disk checking process to finish.
Step 6: Once the process ends, all the errors being faced by your computer will be listed. Rectify them.
Similar Posts:
- Unexpected Store Exception
- Kmode Exception Not Handled in Windows
- Error Code 0x80070570
- Error Code 0xc1900208
Final Words
The nvlddmkm.Sys error is one that has been encountered by several users in the past. It is a very common mishap, so you need not panic if you experience it too. However, if none of the solutions work, then it is probably an item in the motherboard of your computer that is causing the problem. It is highly recommended you take your device for repair to an electronics store in this case.


