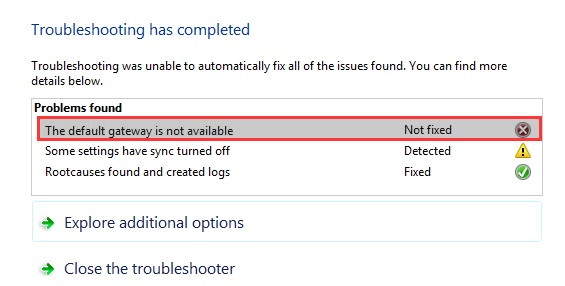
After upgrading to Windows 10, many people have reported the issue “The Default Gateway is Not Available“. People who have suffered from this issue have no access to the web at all or internet connection doesn’t comes every time. So basically this issue means that you have no connectivity or limited connectivity. The computer switch to wireless and says “no internet” after updating to Windows 10.
The system tray shows an ❌ on the network icon on the screen. It means that the user will not be able to access the internet. The default Gateway is a part of the system which passes packets from your network to the outside network. When The Default Gateway is Not Available error comes then you will not be able to communicate with the network from outside.
Corrupted adapter drivers and their incompatibility and malware or viruses are the main reasons for this error. Therefore there is a need to troubleshoot this issue entirely. Any product of McAfee can be the victim of the error default gateway is not available. This is an error which is needed to be resolved as soon as possible because internet is a big need for everyone nowadays
Contents
How to Fix The Default Gateway is Not Available Error
Firstly have a backup of your files and folders as in case of any bad situation your data will not be lost. To solve this issue I have mentioned the ways below:
Solution 1: Updating Windows 10 and Drivers
This error means that the hardware is not being able to collaborate or connect with Windows 10. The cause of this problem can be the incompatibility of the old drivers. So to fix this error there is a need for you to update your PC to Windows 10. As a result of which the drivers will be updated automatically.
Solution 2: Changing the Frequency of the Wireless Router
Nowadays due to the advancement of technology, there are new high-tech routers. So the latest high-tech router can support up-to 5GHz frequency but your current adapter may not support up to this frequency.
There should be a change of frequency from automatic to a certain value. You can take help from the user manual of your router for changing the frequency as the channel of your router can be a reason for The Default Gateway is Not Available error.
Also Read:
- The Requested Operation Requires Elevation
- Windows Spotlight Not Working
- What is SppExtComObjPatcher.exe, Is It A Trojan?
- The Default Gateway is Not Available
Solution 3: Uninstalling the Network Adapter Drivers
This is another solution by which you can fix the error the default gateway is not available. There is no need for you to worry about uninstalling the network adapter drivers as when Windows reboots, it reinstalls its drivers again. For uninstalling the network adapter drivers, follow the steps which are mentioned below:
Step 1 – Apply the shortcut “Windows + R” and then a search box will open.
Step 2 – Type “devmgmt.msc” in the search box and enter to open the “Device Manager”.
Step 3 – Expand the network adapters and search the name of your network adapter.
Step 4 – Always ensure to note the name of your network adapter as it will be required later.
Step 5 – Uninstall the network adapter after right-clicking on it.
Step 6 – Select “Yes” for the confirmation.
Step 7 – Reboot your PC and check the Network Connectivity.
Step 8 – If you are unable to connect with your network then “Driver Software” will not be installed automatically.
Step 9 – For this, you need to visit to the manufacturer’s website to download the driver. Now your web is not working also so drivers cannot be installed.
Solution 4: Changing your Network Adapter Drivers
Changing your network adapter drivers with a different set of drivers can also be a solution of The Default Gateway is Not Available Error.
Step 1 – Apply the shortcut “Windows + R” and then a search box will open
Step 2 – Type “devmgmt.msc” in the search box and enter to open the “Device Manager“.
Step 3 – Expand the network adapters and search the name of your network adapter.
Step 4 – Click on the Update Driver after right-clicking on your network adapter.
Step 5 – Two options will be seen on the screen from which you have to choose “Browse My Computer for Driver Software.”
Step 6 – Choose the option “let me pick from a list of device on my computer” and untick the “Show Compatible Hardware“.
Step 7 – Select your network adapter driver from the list and click on “Next“.
Step 8 – Follow the remaining instruction and then reboot your PC.
If your PC is not finding network adapters throughout the method, then you can find on the internet on how to fix Network Adapter Missing error.
Solution 5: Manually Assigning the IP Address and Default Gateway
Step 1 – Press “Windows + X” and choose the command prompt.
Step 2 – Type “ipconfig” and then hit enter
Step 3 – Ensure to note the default gateway, IP address and also subnet mask which will be listed on the WIFI
Step 4 – Right-click on the wireless icon and choose the option “open network and sharing center.”
Step 5 – Then click on the “Change Adapter Settings” which on the left side of the screen.
Step 6 – Select “Properties” after right-clicking on “Wireless Adapter Connection“.
Step 7 – Find the “IP Version 4” and then click on the “Properties“.
Step 8 – Enable “Use the Following IP Address” and type the default gateway, IP address, and subnet which were noted by you.
Step 9 – Click on “Apply” and then “OK“. After that reboot your system
Solution 6: Removing the Antivirus programs
Step 1 – Apply the shortcut “Windows + R”
Step 2 – Write “appwiz.cpl” and then tap “Enter”
Step 3 – Select your “McAfee” program and then uninstall it
Step 4 – Reboot your PC and that issue is solved
Solution 7: Changing the power saving mode of a wireless adapter
Step 1 – Apply the shortcut “Windows + S” and then enter “Power Options“.
Step 2 – Choose the power option and find your current plan to change it.
Step 3 – Click on the “Change Advanced Power Settings”.
Step 4 – Go to the “Wireless Adapter Settings” and then enable the “Maximum Performance“.
Step 5 – Click on Apply and then OK.
Solution 8: Using the “netshell” Reset Command
Step 1 – Press “Windows + X” and choose the command prompt
Step 2 – Write “nets hint ip reset” in the command prompt and then hit “Enter“.
Step 3 – Restart your PC after closing the command prompt.
Also Read:
- WLDcore.dll is Missing Error in Windows 10, 8 and 7
- NVIDIA Installer Cannot Continue
- Dragon Age Inquisition Won’t Launch
Final Words
So we hope that the error “the gateway is not available” in Windows 10 Operating system is resolved by now. And there is no loss of your data also


