In July 2015, Microsoft released Windows 10 the latest operating software. An instant hit as around 24 million users upgraded to it in less than 24 hours. The latest OS received significant changes in terms of ease of access, GUI, services, and appearance. Around the same time duration, many users reported receiving The Requested Operation Requires Elevation Error message.
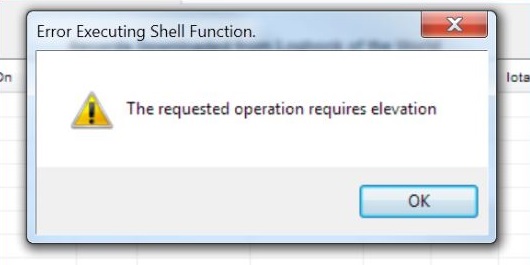
Whenever they tried to performs actions that required administrator access. Whether it was running executable files or trying to install or update games the users received an error message- “The Requested Operation requires Elevation“.
Contents
5 Ways to Fix The Requested Operation requires Elevation
Here we have listed solutions on how to fix The Requested Operation Requires Elevation Error. Methodically follow them to fix this.
Method 1 – Disable the UAC
UAC or User access control is an important component of the “windows security system”. Its main function is to help the applications running in the windows to prevent your system from making any undesired changes. Whenever software is running in a system and it tries to make changes in the system, a window dialogue box appears that is UAC.
It notifies the user about the changes and whether he wants to Apply the changes to his system or not. After the launch of Windows 10, there were bugs that caused every application being scrutinized by UAC. Here we will try to disable the UAC and check whether this fix works.
Step 1 – First press “Windows + R” to launch the Run Type “gpedit.msc” in the dialogue box and then press Enter. This will launch the local group policy editor. Proceed with extreme care as the local group policy editor is a powerful tool.
Step 2 – Next navigate to the following file path on the left side of the screen:-
Computer Configuration> Windows settings> Security settings> Local policies> Security options
Step 3 – Then scroll to the bottom and look for “User Account Control Behaviour of the Elevation Prompt for Administrators in Admin Approval Mode“. Double-click it to open its Properties.
Step 4 – Next navigate to Local Security Setting and set the option there to “Elevate Without Prompting”. Save these changes and exit.
Step 5 – Then proceed to search through the items for “User Account Control: Detect Application Installations and Prompt for Elevation“. After you find the item, double-click on its properties to open it.
Step 6 – After this navigate to the Local Security Setting tab and set the option there as Disabled. Press OK again to save these changes and exit the item.
Step 7 – Now search through the items for “User Account Control: Run all administrators in Admin Approval Mode“. Once you find the item, double-click on properties to open it.
Step 8 – Next search for “User Account Control: Only elevate UI Access applications that are installed in secure locations“. After you find the item, double-click on it to open its Properties.
Step 10 – Now click on the Local Security Setting tab and set the option there as Disabled. Press OK to save the change.
Step 11 – Now you have to press Windows + S to launch the start menu’s search bar. Their type “user account control” and select it.
Step 12 – Finally open the setting and Drag the slider all the way down. Next press OK to save changes to the computer. Restart your computer in order for the changes to take place.
Method 2: Adding Domain Admins Group to the Local Administrators Group
If the above solution is unable to fix the requested operation requires elevation error. The next solution is to try adding the domain administrators’ group to the local administrator’s group and check if the error gets fixed.
This fix is for individuals receiving the error message when they register their computer to any domain. If this is not the case for you, please refer to the solution down below.
First, we will Define A Security Group in AD computers and users. Here, we will call our security group as TechTade IT.
Step 1 – Log on your Domain Controller.
Step 2 – Then Right-click on Users and select New from the options. After this click on Groups and then Security. Rename it as TechTade IT.
Step 3 – Now add valid and proper members. Here you can add the username of the other users.
Now, we have to Create a Group Policy. Though there is a short-cut for this by using the Default Domain Policy we won’t recommend it. Instead, we will create a new policy named “Local Administrators“.
Step 1 – First you have to launch your Group Policy Management Console.
Step 2 – After this, you have to right-click on your domain.
Step 3 – Create a GPO and link it here.
Step 4 – Name it as Local Administrators.
Step 5 – If the policy is successfully created, you will be able to see it in the tree.
Next, we have to Edit the Policy to contain the TechTade_IT group. You can put it into any group that you wish of.
Step 1 – First, Right-click on the “Local Administrators” policy and expand the “Computer Configuration \ Policies \ Windows Settings \ Restricted Groups“.
Step 2 – Now at the right side of the window of Restricted Groups, right-click and select “Add Group…“.
Step 3 – Save it as “TechTade_IT” and press OK to save changes.
Step 4 – Now click Add under the subheading of “This group is a member of:” and add the “Administrators” and “Remote Desktop Users”.
Step 5 – Finally press OK to save these changes.
Here, if you change “Members of this group:” it will on its own overwrite the accounts you have had set up in the initial stages.
To test whether this process is successful or not follow these steps-
Step 1 – After a time interval of 10-15 minutes log onto a PC.
Step 2 – Type “gpupdate/force” and then check for the local administrator’s group. If you have performed the above steps correctly, you will be able to see TechTade_IT in that group.
Step 3 – Now all the users of the group can access the PCs.
Method 3 – Disabling the Admin Approval Mode for Built-in Administrator
If you confront the difficulty right after updating Windows to its latest version, then it is possible that the system may automatically enable the option of “Admin Approval for built-in Administrator”.
It means that your computer will now request permission whenever you want to complete administrative tasks even though you are an administrator. This particular policy is found in the group policy editor and we will help you to try and change it.
Step 1 – First press Windows + R on your keyboard to launch the Run application. Type “gpedit.msc“ here this will launch the local group policy editor. Keep in mind that the Local group policy editor is a powerful tool and requires extreme precaution.
Step 2 – Next you have to navigate to the following file path:
Computer Configuration > Windows Settings > Security Settings > Local Policies > Security Options
Step 3 – On the right side of the window, where there are a lot of items scroll to the bottom and look for “User Account Control: Admin Approval Mode for the Built-in Administrator account Local Security Setting tab”. Double-click on its properties.
Step 4 – Finally set the option as Disabled and save the changes.
Step 5 – To check, Restart your PC and see if the problem is gone or still persist.
Method 4 – Change the Ownership of Files
Encountering this error while accessing any file, either on your PC or the hard drive. You can try to change the ownership of these files. If you Switch ownership of any file/folder it will, in turn, make you the sole owner and then the computer will be able to give you access to perform any action which may earlier require administrator access.
It is also fit for people who have a backup on an external hard drive and after replacing PCs, they see the requested operation requires elevation error information whenever they try to locate it. Here you can simply change the ownership of the external hard drive by selecting Properties and then navigating to its Security tab.
Now all you have to do is to follow the instructions on how to normally change ownership. If you stumble on this problem frequently there is an alternative to add “Change Ownership” key to your context menu.
Method 5 – Running the Program as Administrator
You may also experience these error messages while executing some command on command prompt or opening a system file. Probably, the PC isn’t allowing you to access because you don’t have the administrative rights to execute the command.
Step 1 – To overcome this, you need to re-launch the application using the choice “Run as administrator” and then verify if you still receive the requested operation requires elevation error.
Step 2 – In this particular case, press Windows + S and then type “command prompt”.
Step 3 – After the search results come, right-click on the command prompt and then select “Run as Administrator“.
Step 4 – Now you will be able to easily execute commands like “netstat –anb” etc. without an obstruction.
Also Read:
- WLDcore.dll is Missing Error in Windows 10, 8 and 7
- NVIDIA Installer Cannot Continue
- Dragon Age Inquisition Won’t Launch
- Windows Spotlight Not Working
- What is SppExtComObjPatcher.exe, Is It A Trojan?
- The Default Gateway is Not Available
Conclusion
The aforementioned methods will surely work for you and will help in fixing The Requested Operation Requires Elevation error accordingly. Thus, allowing you to access as an administrator and make desired changes in the system.


