Are you getting “VAC Was Unable to Verify the Game Session” error in CS: GO? Well, Many CS: GO Players are facing the same error. In the modern gaming industry, players find joy in competing with one another to be victorious. In this new digital world of the arcade, competition-driven users are very much capable of indulging in unfair practices to win over another player.
To cater to this, the VAC is short for the Valve Anti-Cheat system. It was a program developed with the simple purpose of combating any such malpractices that make the game zone unfair for players. It was mainly created for massive games like Counter-Strike: Global Offensive, and so on. It merely overlooked any forms of cheating in the game and blocked players indulging in the same.
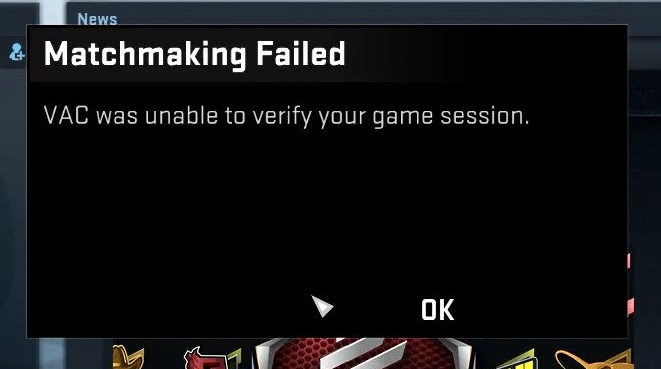
However, just as all components, VAC is also one prone to specific errors. As an attempt to bring fairness to the game, the VAC alert can very possibly appear on the screens of people who have not adopted any malpractices at all. It causes the following words to flash on your screen when you try starting a game: VAC Was Unable to Verify the Game Session.
Contents
How To Fix VAC Was Unable to Verify Your Game Session Error
If you are a player who has encountered VAC Was Unable to Verify Your Game Session error without any conscious fault of your own, do not worry. Here are some simple solutions you can try to get rid of the alert and continue with your game:
Solution 1: Reboot Your Computer
A lot of times, the reason why you may be experiencing VAC Was Unable to Verify the Game Session error is because the files that VAC needs to verify in order for the game to function are being accessed by another application on your desktop.
Without you consciously knowing, your computer’s antivirus or maybe a disk indexing service could be using the file in question, thus causing VAC to display the error as a safety precaution before you proceed with the game. In this case, you need to simply reboot your PC. This can be done in a lot of ways, so the most basic one is listed for your reference:
Step 1 – First, click on the Windows symbol on the left bottom of your screen.
Step 2 – Click on the power button from the menu that opens. Then, click on the word
‘Restart’ and wait for it to do so.
Solution 2: Log Out of Steam and Log in Again
Sometimes, the most basic solution to an error like this is to log out of your software and log back in simply. It refreshes your data in a way, thus removing any glitch that may have occurred in your game. It will remove any fault in the configuration and the file management system of the computer. The way to go about doing this is as follows:
Step 1 – To start with, open your Steam application and click on your profile’s name on the title bar (located on the top of the window).
Step 2 – This will open a drop down menu. Here, click on the words ‘Log Out of my Account’ and follow what is written in the dialogue box.
Step 3 – Close the application using the X in the top right corner and open it again. Enter your credentials on the log in page to access the software.
Step 4 – Check if VAC able identify your gaming session or not.
Solution 3: Repair the Steam Client
The Steam Client plays a very critical part in the configuration of the program and its association with your computer. Sometimes, damage to its files can give rise to an error like this. To fix this, follow the steps:
Step 1 – Press the Windows key and ‘R’ at the same time to open the Run Command.
Step 2 – Manually type in words “cmd” in the dialogue box and press Enter.
Step 3 – In the next window that opens, paste this following link and then press Enter:
"C:\Program Files (x86)\Steam\bin\SteamService.exe" /repair
It should take you to the SteamService.exe in your system. If its location is different in your computer, then type the correct one respectively.
Step 4 – Let the repair process be completed. Once done, restart your computer.
Step 5 – Then, open the Steam application. By now, all the necessary updates and downloads will have been completed. If you are asked to enter your credentials and log in, do so.
Step 6 – Check if the VAC Was Unable to Verify the Game Session error continues to occur.
Solution 4: Exclude the Game Directory from the Antivirus scan
As mentioned before, it is quite likely that any other application like an antivirus may be utilising your game files in the background, hence causing the VAC Was Unable to Verify the Game Session error.
In this case, you can even go to the Settings of your antivirus software and exclude the Steam directory as well as the game files from any uncalled background checks. It will keep your data from being run in two places at once, thus eliminating the error for you.
Solution 5: Verify the Integrity of the Game Files
Verifying the integrity of the game files is a crucial practice that you should perform every time you download a new game. It should be done to make sure that all the content required for successfully running the game is installed, hence incapable of causing any disruption while you play. The steps to go about doing this are as follows:
Step 1 – Open the Steam application on your desktop.
Step 2 – Click on the tab that says ‘Library’. It will display a list of all the games you have
installed via Steam on your system.
Step 3 – From the list, find the game at the start of which you received the VAC alert. Right-click on it, and go to the option ‘Properties’.
Step 4 – Once the properties of the game are displayed on your screen, go to the Local tab
and click on ‘Verify integrity of the game‘.
Step 5 – Wait for a few minutes until the verification process is complete. Then, restart Steam and open the infected game. Check if you can play it.
Also Read:
- 10 Ways to Fix Windows 10 Update Error Code 0x8024a105
- How to Fix 0x80070570 Error
- BSOD Error 0x0000007B: Windows Fail to Boot
Final Words
Everyone deserves smooth and fair game-play without disruptions, and you should be able to achieve yours from one or the other solutions mentioned in the list above. Steam is one of the largest multiplayer platforms, and fair play is something each gamer aspires to have.


