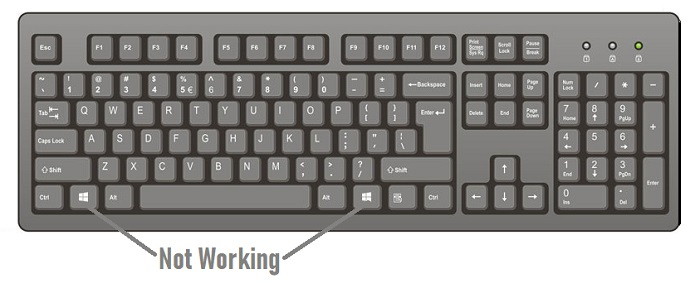
Sometimes windows key not working in Windows 10, Windows key is an integral part when using Windows OS on the PC. Simply hitting on the Windows key will open the Start menu. It is also used along with the ‘R’ and ‘S’ keys respectively to open the ‘Run’ window and the ‘Search’ bar on the Start menu.
Apart from shortcuts, many other functions can be performed by this key. However, quite often, an error ‘Windows Key Not Working’ is encountered by many users using Windows 10 OS. A user using the Windows key frequently can find it really difficult due to this key not working.
Contents
Resolving the Windows Key Not Working on Windows 10
The following methods can be of great help in tackling the Windows key not working error in Windows 10 OS. Let us take a look at these methods.
Method 1 – Change Your Registry
Quite often, a problem with the registry of the system can cause the malfunctioning of the Windows key. This can be rectified by updating the system registry. Follow the steps mentioned below to do the same.
However, one must undertake the utmost precaution while modifying the system registry. Failure to follow this might hamper the entire hardware of the PC. When the damage becomes severe, the Windows 10 file explorer will not open at all.
Steps to modify the registry:
Step 1: Open the Task Manager window.
Step 2: In the Task Manager window, take the following path: File->Run New Task. This opens the ‘Run’ window.
Step 3: Type regedit in the ‘Run’ window to open the Registry Editor.
Step 4: In the Registry Editor window, take the following path: Computer\HKEY_LOCAL_MACHINE\SYSTEM\CurrentControlSet\Control\Keyboard Layout key
Step 5: Locate the Snapcode Map registry entry after expanding the Layout key and delete the same.
Step 6: Exit the Registry Editor window.
Step 7: Check if the Window key works now.
If the Snapcode map registry is not present in the system, then try resolving this by some other method.
Check out:
- GeForce Experience Not Opening
- Windows Key Not Working
- DNS_Probe_Finished_Bad_Config
- DPC Watchdog Violation
Method 2 – Perform a Malware and Virus Scan
The presence of a virus in the system can cause the error of ‘Windows key not working’ to pop up on Windows 10 OS. Viruses tend to disable the Windows key completely, thereby disrupting its functionality. To ensure that the system is not infected by any virus, it is recommended to conduct malware and a virus scan of the entire system.
Follow the steps of the anti-virus software program installed on the machine in order to carry out a full scan of the system. Tools like Malwarebytes and Windows Defender can be used to detect the presence of malicious software within the system.
Method 3 – Disable the Gaming Mode
When a gaming keyboard is used, it is highly likely to have gaming mode on it. When the gaming mode is active, certain keys are automatically disabled on the keyboard, so that they do not interfere in between any gaming sessions.
It is quite possible that the ‘Windows key not working’ error appears due to the gaming mode is enabled on the keyboard. Check for the same and disable the gaming mode by turning off the respective switch. These keys are usually located above the f2 and f3 keys of a gaming keyboard.
Certain keyboards could contain hidden gaming modes. The gaming modes vary depending on the type of keyboard. It is a best practice to go through the keyboard’s manual completely before disabling its gaming mode.
Once the gaming mode is disabled, check if the problem still occurs.
Method 4 – Check the Win Lock Button
Some keyboards contain the Win Lock button on them. This button is mainly designed to disable the Windows key. Check for its presence on the keyboard. Usually, it is located near the right side ‘ctrl’ key on the keyboard. Press the Win Lock button. By doing this, the Windows key will start working again, causing the error to disappear from the system.
Method 5 – Create A New Account
Creating a new user account can solve the error of ‘Windows key not working’. Carry out the following steps to create a new user account.
Step 1: Locate the Control Panel icon on the system and click on the same.
Step 2: In the User accounts section under Control Panel, go to Family->>Other People->>Add someone else to this PC.
Step 3: Select the following path: I don’t have this person’s sign-in information->>Add a user without a Microsoft account.
Step 4: Fill in all the essential details and create a new account.
Step 5: Sign-out of the current account and switch over to the newly created account. Check if the Windows key is working now.
Method 6 – Perform a System File Checker Scan
The problem of ‘Windows key not working’ can occur due to the Windows 10 becoming corrupt on the system. To resolve this error, a system file checker scan can be conducted on the machine. Check the steps mentioned below.
Step 1: Open the Task Manager window.
Step 2: Go to File->>Run New Task
Step 3: Type ‘cmd’ in the ‘Create New Task’ window.
Step 4: On the command prompt window, type the following command: sfc/scannow. The full path should be: C:\Windows\system32>sfc/scannow. Press the ‘Enter’ key.
Step 5: The scanning process might take some time.
Step 6: On completion of the scanning activity, restart the machine.
Check whether the Windows key problem has been resolved now.
Method 7 – Uninstall Bad Keyboard Drivers
The presence of any bad keyboard drivers in the system can cause the ‘Windows key not working’ error to appear. To resolve this, it is recommended that these drivers be uninstalled so that fresh drivers can be installed again.
These drivers can be removed from the keyboard section in the Device Drivers section. Restart the system when the drivers have been uninstalled. Windows automatically reinstalls the error-free drivers.
Now check whether the error has been resolved.
Method 8 – Use of the Powershell Command
A Powershell command can help resolve the Windows 10 issue. It is a powerful command-line tool that can be used to remove core Windows 10 components. Consider the following steps.
Step 1: Open the Task Manager Window.
Step 2: Go to File->>Run new task.
Step 3: On the Create New Task window, type ‘Powershell’. Ensure that the checkbox ‘Create this task with administrative privileges’ is checked.
Step 4: The ‘Administrator: Windows Powershell’ window opens.
Step 5: Type the following command in the Powershell window: Get-AppXPackage –AllUsers | For each {Add-AppxPackage –DisableDevelopmentMode –Register “$($_.InstallLocation)AppXManifest.xml”}.
Step 6: Pressing the Enter key will run this command.
This should sort out the ‘Windows key not working’ issue.
Method 9 – Restart Your Windows or File Explorer
Sometimes, restarting the File Explorer can sort out this error. First, locate the explorer thread and kill it in the Task Manager. After that, again start the explorer.
Step 1: Open the Task Manager window.
Step 2: Go to File->>Run new task.
Step 3: In the ‘Create New Task’ window, type the command ‘explorer.exe’.
The above steps cause the explorer to start again.
Now check if the Window key error still occurs.
Method 10 – Switch off the Filter Keys
Filter keys is enabled on the keyboard can cause the occurrence of the ‘Windows key not working’ error. In such situations, it is always recommended that the filter keys be turned off. Follow the steps below to do the same.
Step 1: Go to Control Panel->>Ease of Access->>Ease of Access Center->>Change how your keyboard works.
Step 2: Locate the option ‘Turn on Filter keys’.
Step 3: Deselect this option if at all it is selected.
The above steps will turn off the filter keys. Now the ‘Windows key not working’ error should get resolved.
Also Read:
Conclusion
Following the above-mentioned techniques should definitely provide a solution to the ‘Windows key not working’ error in Windows 10.


