By “instructing” the GPU not to render anything that isn’t in the player’s immediate view, the OpenGL setting in Minecraft can help reduce the game’s processing load, allowing the game to run more smoothly and quickly on your computer.
It’s evident that there’s a compromise, with the GPU taking on less work but the CPU having to work harder.
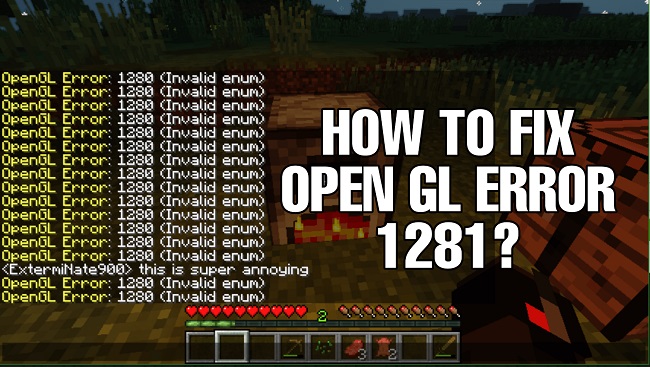
Contents
Method 1: We can get rid of all the Shaders.
Minecraft shaders are an add-on that expands the game’s visual customization options. These additions are more akin to little tweaks that alter the game’s atmosphere, such as making it feel more like summer instead of winter.
Shaders are notorious for causing problems with other mod modules because they consume all the system resources. To figure out which shader is causing the error, try turning them all off one by one.
You should begin with the one that was just added and work your way down. If you’d like to save the shaders for later usage, you can copy and paste them somewhere else.
Method 2: OptiFine Update
With the help of OptiFine, you can improve Minecraft’s visuals and performance without having to learn any code. It also features high-definition texture support and other options vital to modification. The frame rate of the user’s game can be increased, shaders can be used, and so on.
This is, in a nutshell, what motivates your mods and how they interact with one another. According to our investigation, the error message is typically caused by using an out-of-date version of OptiFine.
Verify the OptiFine version running in Minecraft. If it’s an older version, you should consider going to the OptiFine download page and updating to the most recent version as soon as possible. You should restart the computer and then try to start the game again.
Method 3: We Can Ensure that Our Mods Are Compatible With Each Other by Verifying Their Version Numbers.
The majority of players that encounter OpenGL Error 1281 have heavily modified their Minecraft installation and are employing a large number of different Mod modules. This problem occurs when two or more of your modules are not up to date with each other.
As a result, you should verify the versions of all the add-ons you have installed. If there is a discrepancy, you can try launching the game without the mod and seeing if it helps. The mod’s official developer website makes checking version compatibility a breeze.
Method 4: You can manually install Java packages.
Several programmes, like Minecraft, rely on Java file packages, which are collections of directories containing Java files, to function properly. In fact, all Minecraft mods are written in Java, thus you won’t be able to play if you don’t have the appropriate Java file packages loaded on your computer.
For this workaround, we will manually install Java on your machine and see whether that solves the problem.
- If This PC is on your desktop, right-click it and select Properties.
- Now, under the box labelled System type, verify the type of OS currently running on your machine.
- Right click the file you downloaded and select “Extract here” to save the archive somewhere convenient. To make a copy of the file version folder, open the folder.
- Now, open Windows Explorer by pressing Windows + E, and head to this location:
C:\Program Files\Java (for 32 bit)
C:\Program Files (x86)\Java (for 64 bit)
Now it’s time to paste the file you copied there. Make sure you remember to copy the folder’s name that we just pasted.
5. Click the “Edit profile” button at the very bottom of the Minecraft mod manager’s interface.
6. Check the executable option under Java options (Advanced) and then set the right path. The path to the file we just pasted is shown appropriately in the preceding image.
7. It sounds like you need to restart your computer and then start up Minecraft again. Verify if the problem has been fixed.
Method 5: Reinstalling Minecraft
If nothing else seems to be working, go ahead and reinstall the whole game. Keep in mind that if your data isn’t linked to your profile or backed up, it could be lost. The game’s user data folder can be moved to a new location or copied there.
- To open the Appearance Settings dialogue box, hit the Windows key plus R and then type appwiz.cpl.
- Find Minecraft in the list of programmes, then right-click it and select “Uninstall.” The game can be removed from your computer by running the uninstaller from within its directory. Also, be sure to remove any and all configuration or “mod” files you may have created.
- Go back to Minecraft’s official website and re-download the game after entering the credentials.


