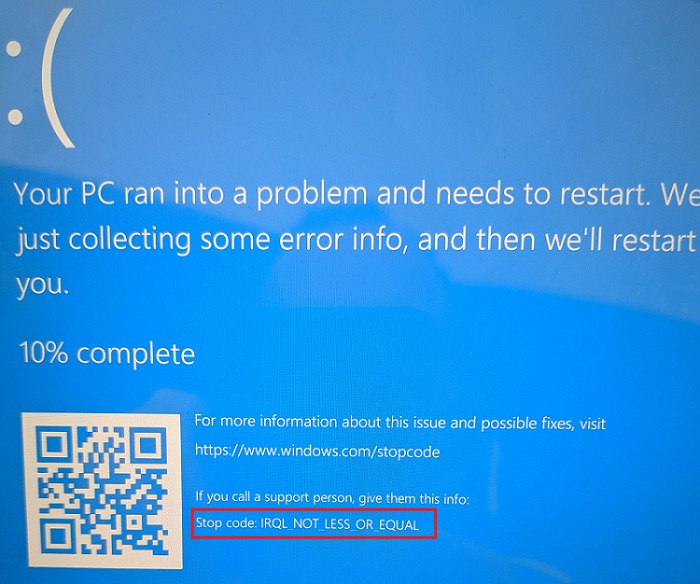
IRQL_NOT_LESS_OR_EQUAL error is one in all the various errors that are classified underneath the Blue Screen of Death (BSOD) errors associated with the Windows OS. Blue Screen of Death errors seems once the Windows System is facing a severe issue. IRQL_NOT_LESS_OR_EQUAL error indicates that either the PC is facing driver problems, or a corrupted Windows Service tries to access a restricted memory location that triggers unauthorized access.
It ends up in the suspension of activity on the laptop because the current login session is terminated, and therefore, the screen turns blue with a message of the error. For many errors associated with this class, it’s advisable to induce the error fastened as shortly as doable as; going it for prolonged periods of your time might lead to a system crash and loss of data, among other things.
Some of the leading causes for this kind of error to occur embrace problems associated with the device drivers like incompatibility and poor installation, problems with hardware and written record and virus and malware attacks.
A good way to make sure that IRQL_NOT_LESS_OR_EQUAL error doesn’t occur is by ensuring that the Windows System and, therefore, the device drivers are all properly put in and up-to-date. Often playacting checks for updates for the OS in addition to any third-party software system and backing up system files is a superb thanks to accomplishing this.
Contents
How to Fix IRQL_NOT_LESS_OR_EQUAL error in Windows 10
Method 1: Using Safe Mode to Start the Computer
Step 1: First, click on the Shift + On-screen power button.
Step 2: Select “Restart” while holding down the shift key.
Step 3: Then open Troubleshoot and click on the Advanced tab.
Step 4: Afterward, click on Startup Settings and then select “Restart.”
Step 5: Upon clicking, the system restarts, after which you can choose the Safe Mode option.
If the IRQL_NOT_LESS_OR_EQUAL error still persists, it indicates that the problem lies with the hardware and not with the software or drivers or any of the third-party applications.
Method 2: Debugging the RAM
Step 1: Windows provides us with an already installed utility and to locate the problems within the hardware.
Step 2: Use Windows + S to get the Search bar and type “Windows Memory Diagnostic”.
Step 3: Open the “Windows Memory Diagnostic” from the list displayed.
Step 4: This function leads you to two options; you have to select the option that says “Restart now” and check for problems. The scan may perform either immediately or during the restart of the system.
Step 5: Performing this scan will show a list of errors in the memory or RAM, indicating the need for replacement of the RAM.
Step 6: After replacement, the system should function properly.
Method 3: Disabling the Memory Cache
There are two ways by which we can disable the memory Cache:
Solution 1:
Step 1: Click on the BIOS set-up keys or F2 key to use the Basic input/output system feature.
Step 2: After that, go to “Memory Settings.” Then disable the “Memory caching feature.”
Solution 2:
Step 1: Use shortcut Windows + S to open the Search menu and type in “Device Manager.”
Step 2: Then hit on the Disk Drives option, and you will see the name of a drive.
Step 3: Afterward, open the drive and go to the “Policies” window.
Step 4: Choose the option that disables the driver and Select Ok.
Step 5: Finally, restart your system to implement the changes.
Method 4: Disabling Connected Devices and Drivers
Step 1: Get rid of all the devices connected to the computer, such as USB sticks, flash drives, etc. by disconnecting them.
Step 2: Find the device drivers connected to the system and disconnect them
Step 3: Try restarting the PC without these external devices connected.
Step 4: Enable each device individually in an orderly fashion and check if the error resurfaces.
Step 5: When it does, it confirms the fact that the driver/device just enabled contains the issue and actions have to be taken accordingly.
Step 6: In “Safe Mode,” uninstall the driver and then reinstall it later solving the IRQL_NOT_LESS_OR_EQUAL problem.
Method 5: Using the Command Prompt feature to Fix Corrupted Files in the Registry
Step 1: Open the search menu using Windows + S and type in “cmd.”
Step 2: Open “Command Prompt” with administrator privileges.
Step 3: Type the command “sfc /scannow” in the prompt.
Step 4: Finally, restart the system after the end of scanning.
It is always recommended to back up your Registry before performing any actions that may or may not involve deleting or editing of any sort.
Method 6: Running System Restore
Windows regularly come up with updates to improve the working of the operating system. Sometimes, an update instead of helping run things smoothly turns out to worsen the situation. Therefore, we recommend reverting back to the settings before the update by creating a system restore checkpoints.
If you have already set a restore checkpoint, use that to revert back to when the PC worked without any issues. If not, then proceed to another solution.
Step 1: Use the shortcut Windows + R to start “Run”.
Step 2: Enter “rstrui.exe”.
Step 3: Check “Choose a different restore point”.
Step 4: Select an appropriate checkpoint and enter
Step 5: Click on “Finish”.
Restart your system and wait until it completes the System Restore procedure.
Recommended:
- There Was A Problem Resetting your PC
- Kmode Exception Not Handled
- VIDEO_TDR_FAILURE Error
- Com Surrogate Has Stopped Working
Conclusion
The error can either be devastating or a minor problem, depending on how you choose to handle the situation. It is important to realize that you were lucky because this error is an indication that some files may go missing or corrupt, and it is the need of the hour to check for the same or face the BSOD error, which can be harder to handle. Therefore, be cautious and follow any of the above methods to guarantee a flawless running of the system.
Thank You For Reading!


 errors. Learn how to fix IRQL_NOT_LESS_OR_EQUAL error with these 6 methods.)