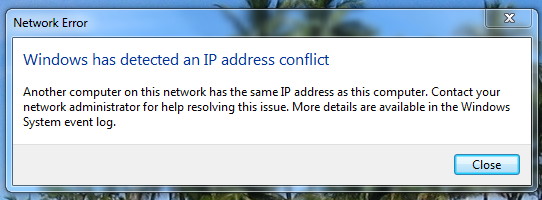
Windows has detected an IP address conflict error on your computer describes that one or more device is also entrusted with the same IP address at the same time same as your PC. This error is standard nowadays, and it can also be solved swiftly.
It happens when a router transfers the same IP address to some other computers. Not only this, but it can also occur even if a single device is connected to the same network. If more than one computer has the same IP address, it will not be attainable. It is known to all and is very common that every IP address has a unique address for identifying a device and determining them.
Logically we can say that it might happen if your neighbour has the same house address. This may surely confuse the courier boy to deliver the courier at the correct house mentioned. Another logical reason can be that same account number in a bank is possessed by two different people. This can create a serious money problem. But there is nothing to worry as our banking software is highly vigorous.
These two valid reasons may undoubtedly help you to know why having the same IP address can create a problem. The same thing can occur on your computer. The device is impotent to allocate resources, to other computers because of their necessities so that there should be no confusion, and this leads to the error “Windows has Detected an IP Address Conflict“.
Contents
How to Fix Windows has Detected an IP Address Conflict
This problem seems complicated, but there is nothing to worry as we are here with the solutions. Simple methods have been mentioned below. Just go through the steps carefully and follow the given steps. If any problem occurs in between then, you can restart these methods once again.
Solution 1 – Disable and Enable the Network Adapter
Disabling and enabling the Network Adapter again may surely help you to get rid of the error “Windows has detected an IP address conflict.”
Step 1 – Click on the Windows Key + R at the same time.
Step 2 – After this, type “ncpa.cpl” and click on the Enter button. Meanwhile, check that “Network Adapter Missing Error” is not present in your computer.
Step 3 – Now, you need to Disable the Wireless Adapter. So, right-click on your Wireless Adapter, a list box will open and then look for Disable option from the list. This is done for Disabling the Network Adapter on your computer.
Step 4 – Again right-click on the Wireless Adapter, and a list will appear. Look for Enable and select it. This will help you to restart the Network Adapter on your computer.
Solution 2 – Release and Renew IP Address
This method will resolve the “Windows has Detected an IP Address Conflict” in a shorter period of time. Follow the steps nicely because the core of the system will be modified by the Command prompts.
Step 1 – At first, navigate to the start menu, a search box will appear type “cmd.” A list will appear to search for an option named ‘cmd’. Or you can also do this by pressing Windows Key + X and from the menu select Command Prompt (Admin).
Step 2 – A black window will come up next. Type “ipconfig/release” and then press Enter. Now you have to wait for the arrow key to appear again on the Command Prompt screen(black screen).
Step 3 – When the black screen will appear type “ipconfig/renew” and hit Enter. On the other hand, also check if your PC is having any DNS Address could not be Found Error.
Step 4 – Once you are done, you can continue smoothly and stroll over the internet.
Solution 3 – Explicitly Restarting the Router
It might be possible that your router is unsuccessful to give a suitable IP address to your computer. This can also be the reason behind this error. To rectify Windows has Detected an IP Address Conflict error, follow the steps mentioned below:
Step 1 – Firstly navigate to the Power button of the router.
Step 2 – When you get the power button press the button (this will turn off the router). Now, wait for 10- 20 seconds.
Step 3 – At last, click on the Power button again to switch ON the router.
Solution 4 – Eliminating the Static IP
Step 1 – Open a Window pop-up. To open this, press the Windows Key + R at the same time.
Step 2 – After this, click on the box and type “ncpa.cpl” in the blank space and then hit Enter. By doing so, you will open the Network Connections window.
Step 3 – When the Network Connections window is open, find Local Area Connection and then right-click on it. A list will appear to choose Properties option.
Step 4 – You will find a new window opened. Look for Internet Protocol Version 4 (TCP/IPv4) and then double click on it. And then select Obtain an IP address automatically and Obtain DNS server address automatically options in this window. Confirm this by clicking on the OK option.
Step 5 – At last, reboot your computer and check if the Windows has Detected an IP Address Conflict error message has disappeared.
Solution 5 – Disabling IPv6
To disable the IPv6, follow these simple steps mentioned below :
Step 1 – Firstly, Press the Windows key + R at the same time. You will see a new window appears on the computer screen.
Step 2 – Click on the blank space and type “ncpa.cpl” and then click on Enter. A window will open with the name Network Connection.
Step 3 – Look for Network Adapter and right-click on it. After this select property from the list given.
Step 4 – Search for window Uncheck Internet Protocol Version 6 (TCP/IPv6), in the properties, and then click on OK.
Recommended:
- The Active Directory Domain Services is Currently Unavailable
- Modern Setup Host Stopped Working
- Outlook Keeps Asking For Password
- CompatTelRunner.exe High CPU and Disk Usage
Final Words
We have provided the best solutions as per our knowledge, and we hope that the above methods have helped you to get rid of the error “Windows has Detected an IP Address Conflict.” In future, if you face this problem again, use the above methods without wasting your time.


