WMI Provider Host error mainly hogs your computer CPU usage. WMI Provider Host High CPU (WmiPrvSE.exe) Error stands for Windows Management Instrumentation Provider Service, its basic function is to help run applications on the Computer.
Thereby, if there is any problem in WMI Provider Host, it hogs your computer CPU usage and many of the features in PC become useless. This behavior or error is generally observed after upgrading your computer from windows 7 to windows 10.
Contents
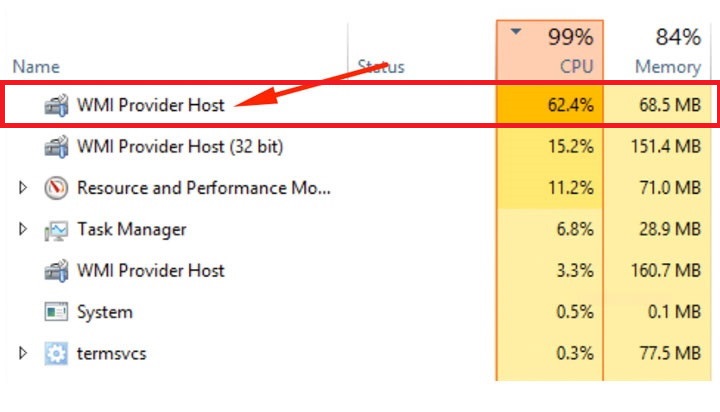
WMI Provider Host (WmiPrvSE.exe) High CPU usage on Windows 10
However, WMI Provider Host High CPU Usage error can be solved easily by following appropriate methods that we are going to share with you in this article.
Method 1 – Restarting the Windows Management Instrumentation Service
Most of the time the issue is with your computer’s WMI Provider Host Service, it might occupy too much space causing problems. Thus, you can try restarting your WMI Service:
Step 1 – Start your computer and then press the Windows + R key combination, it will open run dialogue box.
Step 2 – In the run dialogue box, then type services.msc and hit the enter button.
Step 3 – Next, in the services console window find the Windows Management Instrumentation Service, this can be done by pressing the W key.
Step 4 – Once you’ve located the WMI service right-click on it and then choose restart option to restart the service. Or you can choose to stop the service if you want, but I would say no to it.
Check out:
- GeForce Experience Not Opening
- Windows Key Not Working
- DNS_Probe_Finished_Bad_Config
- DPC Watchdog Violation
Method 2 – Restart Other Associated Services
After you are done with restarting WMI service, head to restart any other associated services by using the following steps:
Step 1 – Start your computer and then open Command Prompt (Admin) from here.
Step 2 – Next, in the command prompt window one by one type the following commands and do press enter after each command:
- net stop iphlpsvc
- net stop wscsvc
- net stop Winmgmt
- net start wscsvc
- net start iphlpsvc
Step 3 – After you are done with this, then reboot your PC and check if the error is solved or not.
Method 3 – Perform a Clean Boot to Identify a Faulty Application
Sometimes high CPU usage by WMI Provider Host can be due to some application thereby, you can perform a clean boot and then isolate the application causing problem. To try this method, follow the steps given below:
Step 1 – First you need to log in to your computer using an Administrator account.
Step 2 – Next, open the Run Dialogue Box by pressing Windows + R key combination.
Step 3 – Then type “msconfig” in the Run dialog box and then hit the Enter button.
Step 4 – After that, select Services in the next window that will open and then uncheck the “Hide all Microsoft Services” button you will see on the left corner bottom.
Step 5 – Next, select Disable All option and then press OK.
Step 6 – Select the “Startup” tab and click on the “Open Task Manager” option.
Step 7 – In the Task manager window click on Startup button > select those applications which have Enabled written next to them and then Disable all of them.
Step 8 – Do the above step for all the applications listed and then restart your computer.
Step 9 – Now that your computer is in the Clean boot mode, do check if the issue has been solved or not.
Step 10 – If the error is solved then it means that it was caused by a third-party application or service.
Step 11 – Next, enable the services one by one, if the high CPU usage comes again then stop enabling those services.
Step 12 – Finally, Reinstall the application/ or the service that caused the error.
Method 4 – Locate the Process Using Event Viewer and Uninstall It
This can be done by the help of following steps:
Step 1 – First of all, you need to open the Event Viewer this can be done in two ways based on your computer windows:
- If you are using windows 7 or any earlier window then you can find Event Viewer in the Start Menu.
- If you are using Windows 8 or 8.1 or 10, then you can find event viewer by pressing Windows + X key combination, this will open WinX Menu and then select Event Viewer from the menu that appears.
Step 2 – In the Event Viewer window click on View in the toolbar > Enable the Show Analytic and Debug Logs option.
Step 3 – Next, you will be redirected to a new window wherein the left panel you will see options, from which select Application and Services Logs > Microsoft > Windows > WMI-Activity.
Step 4 – Next, Double-click on WMI Activity option this will expand its contents from which then select the Operational list.
Step 5 – After that, look for any errors, if you find one > Click on it and see its specifications at the bottom of the window.
Step 6 – In the specifications window, Click on General Tab > Find ClientProcessId term and note down its number.
Step 7 – After that, exit from Event Viewer and then open Task Manager which can be done by pressing Windows + R key combination > type taskmgr and click OK.
Step 8 – Next, in task manager window Select “Services Tab” and then see if there is any other service with the Same Process ID (PID) similar to the ClientProcessID term.
Step 9 – Once you have found the faulty service, Disable It Immediately.
Step 10 – After that Go to Control Panel >Programs & Features and then uninstall the faulty service.
Similar Posts:
Conclusion
So, these were some of the best and most used methods that you can try if you are also facing WMI Provider Host High CPU Error whilst working on your computer. Do remember to follow the steps carefully and in the sequential order, they are mentioned in the article.


