The DNS_Probe_Finished_Bad_Config is an issue that almost everyone has come across especially if an individual uses the Google Chrome browser more and more frequently. If that is the scenario, then he or she might have sometimes faced the issue of spotting a Domain Name System (DNS).
The DNS errors are basically a particular type of bugs that are present in the browser and thereby prevent an individual to gain access to a specific kind of web address that he or she wants to surf.
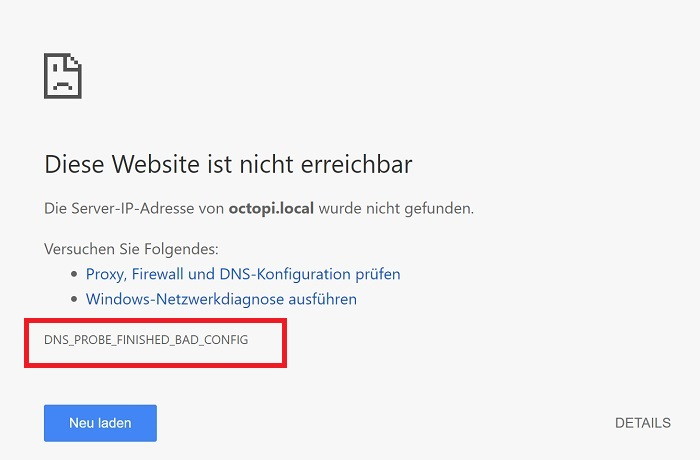
DNS_Probe_Finished_Bad_Config error mainly occurs at the time when a specific web address fails to be accessed and is unreachable. However, there are certain methods for getting rid of this particular kind of problem. Although mostly faced by Chrome, this error can also disturb other browsers but with a slightly different kind of a message.
Read Also:
Contents
How to Fix DNS_Probe_Finished_Bad_Config Issue
Some of the most common causes due to which this kind of error occurs are due to the basic issues faced by a network. They may be extremely insignificant or can be harmful enough to damage the entire system. Each time a user comes across a new kind of error, new methods are simultaneously tried to bring up every single day to get rid of such problems easily. Some of the most effective methods are as follows:-
Method 1 – Use a Different Browser
Sometimes there may be such situations when a particular kind of a web browser itself can be undergoing certain kinds of issues due to which many websites may not be accessed easily. At an initial stage, one should check if there are any such errors like Err_Network_Changed in Google Chrome which one can spot which is the scenario most of the time.
This kind of issue is faced not just by one particular individual but is something almost all kinds of users have mostly come across. In order to resolve such an issue of being a victim to certain problematic browsers, the user can opt for using the technique of trying to access that particular web address from some other sort of a web browser.
If the error showing the message DNS_Probe_Finished_Bad_Config does not occur anymore, then one can easily get rid of their old browser which they were using so far by discarding it and can then proceed to get hold of a brand new update.
Method 2 – Configure DNS Manually
Step 1: Firstly, one should locate and open the option which says Network and Sharing Center which one can easily find in the Control Panel.
Step 2: Then one should select the Change Adapter Settings.
Step 3: After that click on LAN and thereby select the Properties option.
Step 4: After doing so, one should then click on the option which says Internet Protocol Version 4 (TCP/IPv4) and then moves on to click on the Properties tab.
Step 5: Proceed to click on the option saying Use The Following DNS Server Address.
Step 6: One should type 8.8.8.8 in the Preferred Address bar.
Step 7: One should then type 8.8.4.4 in the Alternate Address bar.
Step 8: Then click on the option Validate Settings Upon Exit and then select OK.
Step 9: Finally one should then move on to restart the computer system. Alongside this, it should be checked for any kind of error or issue that may occur which is Unidentified Network No Internet Access in the Windows system.
After successfully configuring the DNS manually, the DNS_Probe_Finished_Bad_Config_ error message will not appear on the screen again. In situations where the user may still find such an error on their screen, other methods are discussed below which can act as alternative effective solutions.
Also Read:
Method 3 – Reset IP Configuration
There may be times when the DNS_Probe_Finished_Bad_Config error may occur as a result of some IP configuration. Such an issue can be really by simply resting the configuration of the IP which can be done by following the given steps below-
Step 1: First of all, one should click on the start button on the desktop and move on to select and open the Run Dialogue Box.
Step 2: In this particular Run Dialogue Box, one should then type “cmd” and then press the Enter key.
Step 3: After that, type the following commands in the Command Window:
netsh int ip reset
netsh winsock reset
ipconfig /flushdns
ipconfig /renew
Step 4: Finally, finish the entire process by restarting the computer system so as to check if the error has been taken care of or not.
The DNS_Probe_Finished_Bad_Config can be resolved by using the above-mentioned method but in case if it fails to resolve the same then a few more solutions have been discussed as follows.
Method 4 – Clear Cookies, Cache, and Temporary Files
As a result of the accumulation of certain files in one’s system, this kind of an error may be caused which can quite easily be resolved with the help of getting rid of any cookies, cache, as well as any sort of temporary files which can be done by following the given steps below-
Step 1: Firstly, one should press Ctrl + Shift + Delete keys altogether so as to check for any kind of cookies or even cache items.
Step 2: Then one can easily click on the option which says Clear Data.
Any cookies, cache or temporary files are no longer there after following these two steps. One can then easily close and then open the browser so as to check if the error has been resolved or not. In case if the problem is still there, then there are a few more effective methods that can be tried out as discussed below.
Method 5 – Update Network Drivers
It is quite a common aspect where it is seen that users tend to avoid the habit of updating their software systems regularly which can be a major reason for such an error to occur. Each time the user updates their software, it means to eventually fix and get rid of some bugs so as to enhance their effective performance.
Hence, one can fix the DNS_Probe_Finished_Bad_Config error by updating their specific drivers which can be done by following the given steps.
Step 1: First of all, one should press the Windows as well as the X keys simultaneously.
Step 2: Click on the option of saying, Device Manager.
Step 3: One should then check for any kind of updates if required for the respective drivers. Once one can locate them, the divers can then be updated accordingly.
Step 4: Finally, finish the entire process by restarting the system.
If the reason for the occurrence of such kind of an error in one’s system is due to the presence of some kind of an outdated driver in that very system, then the problem can be solved within the blink of an eye. But in an otherwise situation, this error can be resolved by using the other effective methods that have been discussed below.
Method 6 – Disable Firewall and Antivirus Programs
In certain situations, users have found out that the reason behind the occurrence of such kind of an error may take place as a result of the presence of some of the security features of the Windows system and they are either Firewall or even the Antivirus software.
They pose a problem to the system by blocking the websites immediately if anything seems suspicious to them. So such an issue can be resolved immediately by disabling the firewall as well as the Antivirus. But this kind of procedure can act as a threat to one’s system as without the firewall and the antivirus their system can eventually become more highly prone to any kind of dangerous attack.
In situations where the firewall and the antivirus are both disabled, one should be even more careful about which sites to visit. However, if this particular method resolved the error problem, then a user should opt for using a different kind of firewall or an antivirus software so as to protect their system from any kind of dangerous attack.
Method 7 – Disconnect and Reconnect to Network
This particular kind of solution can only help itself if one faces any kind of problem with a router belonging to their respective LAN. In most cases, it is seen that by merely disconnecting and reconnecting to the network system, it has immediately helped to resolve such an error and for doing so one needs to follow the given steps and they are-
Step 1: First of all, begin by clicking on the Network icon present in the taskbar.
Step 2: Then one can proceed to click on the network which it had already been connected to and can disconnect it. While doing so, one can also check for any sort of a Windows error that might occur such as DNS Server Not Responding.
Step 3: After that one can easily turn off the router and then proceed to switch it on right after a few minutes.
Step 4: Finally, one can now easily connect to the Network.
If DNS_Probe_Finished_Bad_Config error occurs mainly due to some issue in the network system and the router, then such a problem can be easily resolved by following the above-mentioned steps. And in cases where it still shows a similar problem, then the user can make use of the next method as discussed below.
Read Also:
Conclusion
The above mentioned and vividly discussed methods are the ones that are extremely reliable and effective measures for resolving the DNS_Probe_Finished_Bad_Config error occurring in any user’s system.
Out of all the seven solutions that have been discussed for getting rid of such DNS_Probe_Finished_Bad_Config error which is quite a common sight nowadays, users can be assured of the fact that at least one of the above measures can prove itself to be extremely helpful for the individual facing such an issue with their system by resolving them quite easily.
But whatever may be the method which one chooses to get rid of DNS_Probe_Finished_Bad_Config error occurring on their system, the users should most importantly be more careful while dealing with such kinds of errors on their system by making sure to keep all of their vital and critical data as a back up so as not to lose it at any cost even by a trivial mistake.


